Category Archives: Recipes

St. Patrick’s Day Lunch

Standard

DSC_0003

First off, Happy St. Patrick’s Day!

IMG_0418

I’m Mae from over at The Life Of A Compulsive Crafter. I was asked by the lovely ladies at TWSC to guest blog once a month and quickly said yes!

Though I’m not much of a gourmet cook (eek, recipe please!), I still enjoy being in the kitchen. Today I chose to take a super simple and well known lunch option, tuna sandwiches – and show you a fun way to green them up and make them a bit healthier for St. Patrick’s Day.

Green Tuna Sandwiches

1 can of tuna

1/2  an avocado

2 tbsp mayonnaise

relish *optional

1 tbsp


DSC_0004

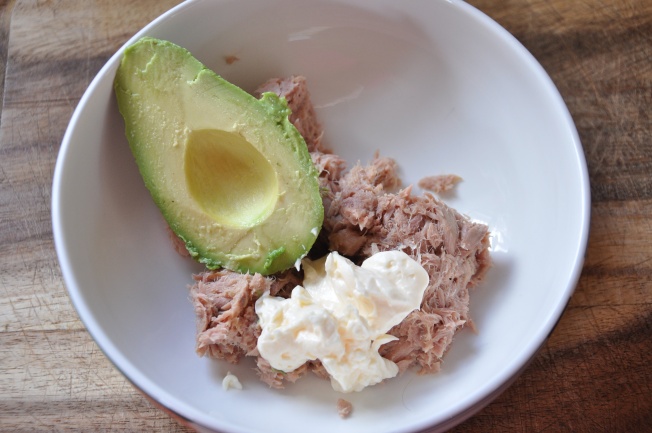
Drain your tuna and place into a medium size bowl. Add your avocado and mayonnaise and mix well.  If you like relish, add that as well. Because the avocado has a nice creamy texture, you’re able to use less of the mayonnaise making it healthier. Plus, I just love me some avocado’s. So, if you’re as big of fan as me, slice up the second half thinly and lay it onto your tuna sandwich.


DSC_0009

I chose to eat mine spooned onto foccacia bread and added an extra punch of green by slicing a granny smith green apple as the side.

If you’re feeling extra green today, consider making this recipe, or you can use your imagination to dream up ways of turning some of your go-to recipe’s green. Pesto sauce? Spinach? I promise, it’s pretty fun! Have a great day!

Mama Nancy’s Sweet Potato Casserole

Standard

We all know what sweet potato casserole is: sweet potatoes with a puffy marshmallow topping, right? Well, as much as I love big white puffy puffs of sugar, I really have never been a fan of the sweet potato casserole made this way. I grew up with my mother’s sweet potato casserole. It’s SO sweet but SO delicious!

Sweet Potato Casserole
The ingredients, simple and sweet:  Canned sweet potatoes, butter, milk, sugar, vanilla and eggs.

Sweet Potato Casserole
Drain your sweet potatoes and dump them into a bowl. Mash the crap out of them!

Sweet Potato Casserole
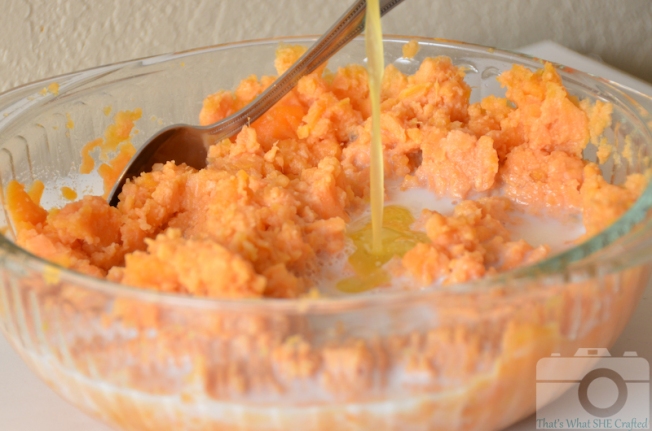
Pour your milk into your bowl of mashed sweet potatoes

Sweet Potato Casserole
Pour in your melted butter. Don’t pee into your casserole.

Sweet Potato Casserole
Dump your sugar, vanilla (Vintage green Tupperware measuring spoons make this casserole taste especially special), two eggs and then mix it all up real nice-like. Mmm mmm good! Now set it aside and we’ll prepare the topping!

Sweet Potato Casserole
Topping Ingredients: Self rising flour, brown sugar, melted butter and chopped pecans

Sweet Potato Casserole
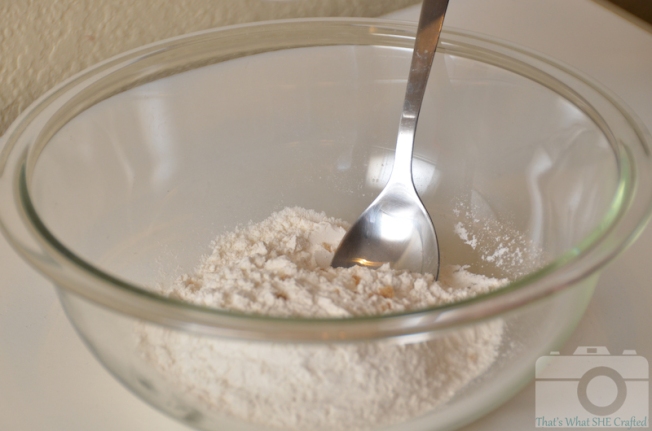
Dump your flour in a clear photogenic pyrex bowl

Sweet Potato Casserole
Dump in the pecans, brown sugar and melted butter in a slow delicate fashion so your husband can snap 3,000 photos to get JUST the right pour picture. Then mix it all up until it’s crumbly and delicious. Yes, I tasted the topping on it’s own. Yes it was delicious.

Sweet Potato Casserole
Pour the topping onto the casserole and smooth it out evenly. If you use a round casserole dish like I did, it’s going to seem like a THICK layer of topping, but it works out just fine. My mama has always made it in this dish, so it probably wouldn’t tasted near as good in any other dish.

Throw it in the oven. Well, don’t THROW it. Just set it in there gently. Unless you’re an angry cook. And you’re not using something breakable. And you don’t mind a big  mess. If that’s the case, go ahead and give it a nice throw.

Sweet Potato Casserole
Take it out of the oven when the topping is looking brown and toasty.

Sweet Potato Casserole
EAT IT. It might seem a little on the runny side when it first comes out. I recommend letting it sit for 15 minutes or so. And believe it or not, this recipe is actually still delicious heated up the next day. And the next day. And 3 days from then. Yum yum delicious!

Ingredients:

3 cans sweet potatos in syrup, drained & mashed
1/2 C milk
1 C sugar
2 eggs
1 T vanilla
1/4 C butter, melted

Topping Ingredients:

1 C chopped pecans
1 C brown sugar
1/2 C self-rising flour
1/3 C butter, melted

Pre-heat oven to 350°. Mix the main ingredients in a the casserole you plan to bake it in. Mix the topping ingredients in a small bowl and then spread evenly over the sweet potato mixture. Bake for 25-35 minutes, until topping is browned and toasty.

Candy

Meat Buns Anyone?

Standard

So I don’t know about you all, but one of my favourite things to do with leftover turkey, or even chopped up chicky boob is to make stew and after a meal or two of stew I find everyone is getting a bit bored of that…  So then I take that stew and turn it into meat buns!!! I LOVE meat buns! Who doesn’t? They are fast, easy, a full meal in the palm of your hand.  (hehe).

So here is a quickie “how to” on making meat buns.

First thing I do in the morning is set a batch of dough off in the bread maker, I use my usual bread recipe by the way. Just be sure you set it on the dough cycle!
twsc meat buns (9)

Get out that gorgeous chicky stew you have made (recipe was up in the previous post)

twsc meat buns (8)

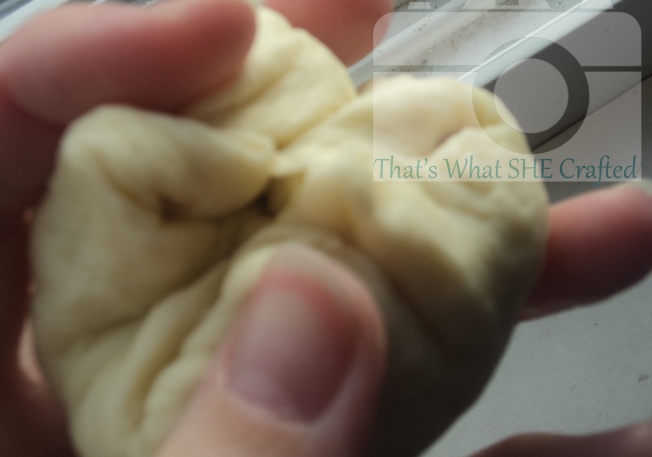
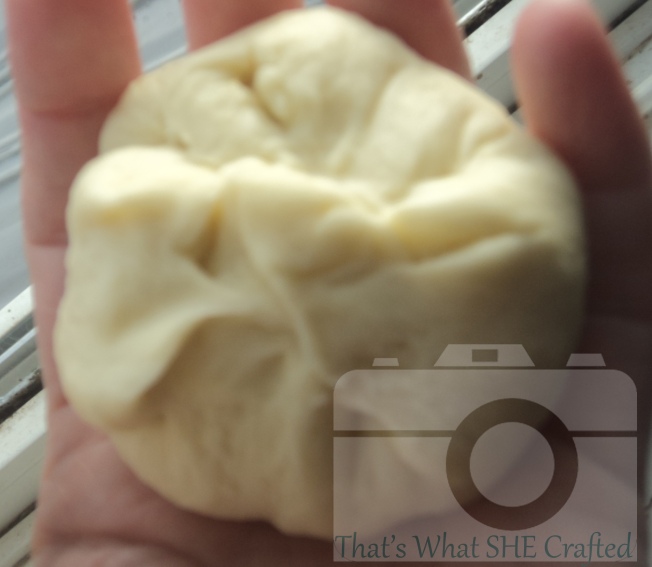
Now take a ball of dough, not too large, and spread it out to flatten in your hand – I use my hand to flatten (ish) it. No need to break out the rolling pin.

twsc meat buns (1)

A tablespoon or two of stew in the middle. You want a good amount but not too much or else you will have your bun break and the stew will try and escape.

twsc meat buns (2)

Fold the bun edges into the center, opposite ends together until your  stew is covered.

twsc meat buns (3)

Then I kinda mush the center together lightly to make sure it is all nicely covered.

twsc meat buns (4)

Turn it over and make sure your stew is contained, see, all nice and pretty. It is ok if yours are not pretty… They will still taste good.

twsc meat buns (5)

This next picture is to show you the dangers of over stuffing the meat bun. (lol! oh the things I write… I am killing it!)

twsc meat buns (6)

Bake at 350 degrees Fahrenheit for about 20 minutes, until they are nicely browned 🙂

twsc meat buns (7)

When I make these up I usually cool them off, bag them, and then pop them into the freezer straight aways. Perfect for meals on the go! So grab a ball in each hand and head out the door in confidence! You will have an amazing lunch on the go! Now go brave those malls and tackle the Christmas shopping!

Jenn

Chicky Stew!

Standard

Friday is our normal day to spotlight another blog or person.  However, we also know  things happen.  What happened this Friday?  Well our featured blogger has been ill for the last week and was unable to be spotlighted today.  So instead we offer this recipe for some nutritious soup that’s bound to make anyone feel at least a little better.

Get Well

***********************************************************************************************************************************

One of my favourite fall/winter meals is Chicken stew! I will use leftover turkey or even just cut up the chicken breast into small pieces for this meal. It is fairly quick and so hearty!  As per How I like things here is THE recipe, my own, made up after many trials and errors to get it how I like it!

Jenn’s Chicky Stew:

  • Chicken, Leftover turkey or chopped up breast.
  • A celery stick or two
  • A good amount of mushroom (if you like them, I love them)
  • half a butternut squash
  • half a sweet potato
  • 3 med size potatos
  • onion

Sauce:

  • a cup ish of water mixed with OXO (chicken flavour)
  • 2Tbsp brown sugar (or a touch more if you like to taste the sweet a little more)
  • Basil. I do a good teaspoon worth.
  •  Cornstarch mixed with some water for thickening.

First I want you to peel all those squash and spuds, cube and get into seperate pot. The potato cooks slowest so get those in water first and then the butternut squash and then the sweet potato. Let them boil until done.

Once you have that done, move onto the chicken and other veg.

Put your chicken (if using raw boob) in the pan and fry it up. When close to done, add the onions, celery, and the basil.  When the celery and onion are close to done add the mushrooms.

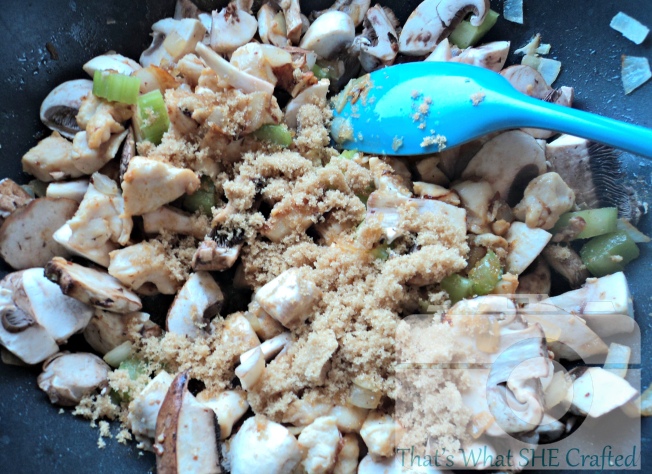
When your veg is cooked, add 2Tbsp of brown sugar and a teaspoon of oil and let it cook for a few minutes, stirring often.

twsc stew (2)

Then add in your chicken oxo into the pot and heat to just below a boil.

twsc stew (4)

Add a bit of cornstarch to water. I usually do a 1/8 cup water to 2 Tbsp of cornstarch. (ish)
twsc stew (3)

Thicken up that sauce and once it is thickened, gravy thick ish NOT pudding thick.  Add in the potato and squash.

twsc stew (5)

Give it a gentle stir until mixed and everything is nicely coated in sauce.

twsc stew (1)

And there you have it, a pretty and delicious chicken stew! Perfect for using up that leftover thanksgiving turkey you have! Enjoy! And if you make this please feel free to comment and let me know how you feel about my stew recipe 🙂

Jenn

What is your go-to fall meal?

Recipe: Campfire Cone Crunchy Munchies

Standard

I don’t go on many road trips.  In fact, I hate road trips.  I get car sick, my kids scream the whole time, my butt hurts and all I end up doing is stuffing my face with food I don’t really like just to pass the time.  With that said, we’re headed on a nice 12 hour road trip soon.  Yay!  Woo Hoo! and FART!  I am not looking forward to it.  I will get sick, my butt will hurt and there’s NOTHING I can do about the kids.  They just hate the car THAT much.  It seems the only thing I am able to change is what I stuff into my face as we drive with the music of the tantrums filling our ears.  I was looking through my cupboard at all of the junk food we don’t have in there and started dreaming.  This is what I came up with:

???????????????????????????????

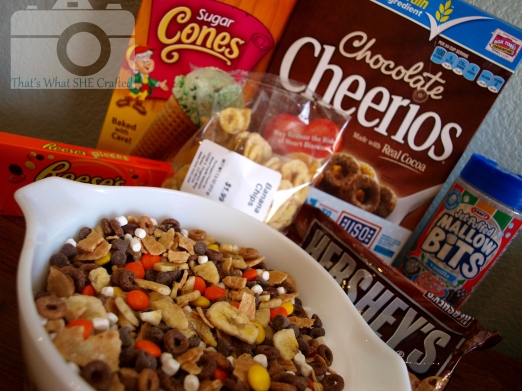
I call it “Campfire Cone Crunchy Munchies”.  Have you ever had a campfire cone?  I haven’t, but I’ve been drooling over this post forever. I decided to go for it and make something super tasty that could make me happy and possibly make the kids quiet down for a bit too.   Here’s the how to:

INGREDIENTS

2 Cups of Chocolate Cheerios

12 Ice Cream Sugar Cones

1 Cup of Reeses Pieces

1 Cup of Jet Puffed Mallow Bites

1 Cup of Dried Banana Chips

*Optional 1 Cup of Milk chocolate chips

NOTE: Chocolate should never be optional.  If you’re serving this at a party it’s actually NOT optional; you must include it.  However, if you’re on a road trip and don’t want to have to question later if that’s poop or chocolate on the seat of your car, omit the chocolate chips.

???????????????????????????????

INSTRUCTIONS

Step 1: Put the sugar cones and banana chips into separate plastic bags and crush into bite size pieces using your hands.  You don’t want to use a rolling pin or food processor because you don’t want to be left with a bunch of crumbs. Besides, we’re not fancy here.  No need for crazy gadgets.  I crush the banana chips because I don’t like to have a giant overpowering chunk of banana in the mix (I’m seriously avoiding dirty jokes right here).  You can leave them whole if you wish

Crunchy Munchies Collage

Step 2: Make like a Food Network chef and put all of your ingredients into pretty bowls.  This step is very important.

Crunchy Munchies Collage2

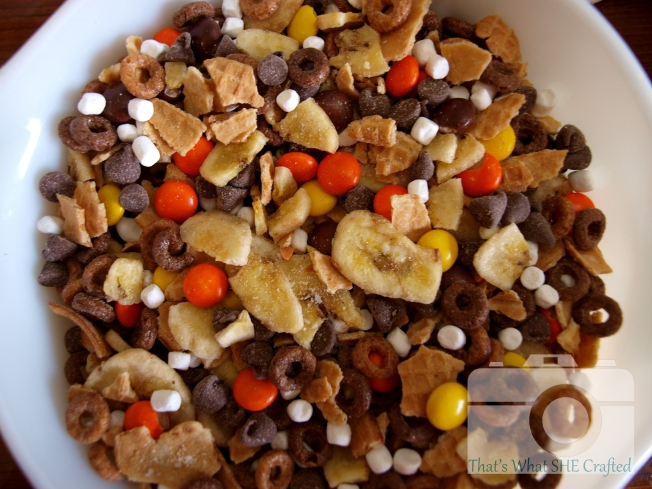
Step 3: Mix it all up in a big bowl.

???????????????????????????????

Step 4: Eat some

Step 5:  Realize that it would be awesome on ice cream and then eat way too much

Step 6: Take a walk, son.  You just consumed like 2,000 calories at dessert.

I hope you enjoy this mix at your next party, car trip, or PMS binge.

-Crystal-

Small FRY-Day Spotlight: Gramma Lollie’s Broccoli Casserole

Standard

Hey everyone!  This month’s Small FRY-day theme is “Family Favorites” although I’m still partial to “Thanksgiving Noms”.  Anyway…what better way to start off that by posting a recipe from MY family?  My wonderful mother-in-law is a fantastic cook and always makes me gain like 15 lbs when she comes to stay with us.  I can not help but eat all of everything that she makes.  It’s a sickness caused by witchcraft, I tell you.  Please enjoy this recipe by one of my favorite Culinary Queens.
-Crystal-

*******************************************************************************************************************

Hello!  My name is Laura but the grandkids call me Gramma Lollie.    I’m so happy to share my recipe with you.  My daughter-in-law can tell you that when I cook,  I mostly just throw it all together and pay no attention to measurements.  This is one of the few recipes that I can actually tell you exactly what’s in it and  pretty closely estimate how much of each ingredient you’ll need.  My broccoli casserole was always a favorite of my kids when they were growing up.  It was devoured VERY quickly once it hit the table.  My daughter even likes to eat the leftovers chilled the next day.  I hope you love it as much as my kids do!

Ingredients:

2- 14 oz packages of Frozen Broccoli

1- Cup Mayonnaise

1- Egg

2 -Cups Shredded Cheddar Cheese

1 -Can Cream of Mushroom Soup

1 – Yellow Onion GRATED (not chopped or diced) (1/2 onion if you’re not a huge onion lover)

Bread crumbs for topping (optional)

INSTRUCTIONS:

Preheat the oven to 350. Cook broccoli florets according to the package’s instructions and drain.  In a bowl, combine remaining ingredients.  Add broccoli, stir and transfer to an oven safe 9×13 dish. Sprinkle with breadcrumbs if desired.

???????????????????????????????

Cook for 30 minutes or until the casserole starts bubbling.  Remove, let cool for 5 minutes and eat!  Easy and delicious!  I hope you love it!

???????????????????????????????

-Gramma Lollie-

Tricks or Treats? It’s a party!

Standard

Sometimes I’m lazy, sometimes I’m really lazy and sometimes I’m just a little lazy.  When it comes to parties I vow to not be lazy.  I try my hardest to come up with awesome ideas and work hard to make sure everything pans out.  There are those heavenly times, though, that I can mix lazy and not lazy and still seem really cool.  That’s what happened for the husband’s 31st birthday.  Dan’s birthday is exceptionally close to Halloween and Halloween also happens to be his favorite Holiday.  It didn’t take much to summon the lazy bones out of the grave and combine the two occasions.  Then there was the phone call to the spirits of Martha Stewart and Monica Geller to pull it all together.  I decided to have a “Tricks or Treats Halloween Party” and this is what happened

Food Collage 2

Here’s the lowdown. I wanted to have food that looked like one thing and COULD be another.  I’m not very good with “treats” though, so I made them all tricks.  Here’s what I made:

There was the Kitty Litter cake.  Not many people were brave enough to eat it, but I did and it was DELISH.  This is where I found the recipe.  It was a treat, but a trick on me since most people were too grossed out to eat any.  It’s just fake poop people.  It was doody-licious.

37959_1212871859730_4568389_n

Next up was the Meatloaf cupcakes with mashed potato frosting.  I’ve seen many variations of this, but the one I used and I thought  was sooooo tasty was from the Every Day with Rachel Ray October 2008 issue. Recipe here. NOM NOM.  I dyed the potatoes, but next time I’d use blue or something less cheesy looking.

71604_1212872019734_4753143_n

I called the punch “toxic sludge” which is not very creative nor was it fooling anyone, but I needed a drink and this was really freaking delicious, so BAM!

67522_1212872219739_3113775_n

To me, the creepiest thing I made was this BBQ hot dog mess.  They really look like worms and EW.  Just EW.

74114_1212872099736_6746531_nAnd the coolest looking TRICK goes to the “pizza” which was just a strawberry Jam tart.  I loved this one and it was also very yummy, too.  It made a fool out of everyone.  I love that.  FOOLISH MORTALS!  I made this also using the October 2008 issue of Every Day with Rachel Ray.  The recipe is here.

73415_1212871939732_3357272_n

I also made some Meatballs called “Sweet Balls of Fire” (enter giggle here).  instead of a tablespoon of  hot pepper sauce, I added like half a bottle of Chili sauce.  Of course I didn’t tell anyone else that and when they ate them, they hated me with the burning of their tongues.  I’m telling you…AWESOME.

Overall, it was a really fun get together full of eating and games.  I had a blast watching people try to figure out if they were being tricked or treated.  No one should have that much fun scheming.  If you can get a hold of the October 2008 issue of Everyday with Rachel Ray, there are many more fun “Trick” recipes to try.  This would be so fun for the kids for Halloween OR April Fool’s day.

Oh yeah!  And I made all the costumes for us that year. I was still really new to sewing and it was a very risky move.  I looked like Wilma Flintstone who decided on a career in bee keeping but after a few stings and a lot of swelling, had to quit and be a stay at home mom.  In other words, my costume was NOT flattering  But the rest of the Flitstones and the Rubbles looked great!

Costume Collage

Have a spookalicious  trick-or-treating Halloween Bash!!!

-Crystal-

Quick Chicken Pot Pie

Standard

My family loves chicken pot pie.  It’s a winner with both kids, comes together quickly, and we typically have leftovers so we can eat it for two nights so it’s a winner in my book too.  This particular recipe started off in The America’s Test Kichen: Quick Family Cookbook and I’ve adjusted it to be a little more to our liking.  Usually I make up the filling during nap time as shredding the chicken can be a bit of a mess and then pop it into the toaster oven shortly before dinner but even if I have to make it all at once I love that it doesn’t take an hour in the oven after having to cook everything together.  Quick dinner= AWESOME!

Quick Chicken Pot Pie---- That's What She Crafted


To begin wash your mushrooms.  I buy the pre-sliced mushrooms because half the time I can find them on “manager’s special” and because I’m a wee bit lazy.  So if you bought whole mushrooms slice them up post bath and put them on a microwave safe plate lined with 2 layers of coffee filters.  We only have the small ones so I usually use 4-6 total filters depending on how many came out of the box when I grabbed them.  You want the plate to be covered though because the filters soak up a lot of the liquid that the mushrooms will give off as they cook.  Microwave until softened, about 7 minutes.  i forgot a before picture so this after cooking picture will have to do!

Mushrooms-- That's What She Crafted

While the mushrooms are taking their spin, combine shredded chicken, Boursin, broth, cream, cornstarch, salt and pepper to taste in large saucepan and cook over medium-high heat, stirring often, until cheese is melted and mixture is thickened, 5 to 7 minutes.  The recipe calls for you to crumble the Boursin when adding it to the pot but honestly, I don’t because I don’t want to waste any of that cheesy goodness by having it stick to my hands so I just stir and mash the clumps.
While you are waiting for the sauce to thicken, if you are like me you’ve forgotten to “thaw” your peas and carrots so throw those into the colander for a bath under some cool water to quick thaw them.
Thawing Peas and Carrots-- That's What She Crafted
After the sauce has thickened stir in microwaved mushrooms and peas and carrots.
Finished Filling-- That's What She Crafted
Transfer to 9-inch deep dish pie plate.  Depending on how much chicken or veggies you may have added extra or maybe you didn’t measure the chicken amount you put in you may not want to put all the filling in the pie dish.  I typically leave out about 1/2 cup to a full cup although when I made it this time I made it I only used 3 chicken thighs and used all of the filling in the pie.  In any case, leave some space so that when the sauce starts bubbling it doesn’t bubble over too much making a mess!
Filling In-- That's What She Crafted
This is the point I stop at as I put together this pie usually during nap time.  Depending on how much time we have until dinner I will cover and refrigerate or I just let it sit on the stove until about half hour to an hour before I want to serve dinner.   The last part is easy enough for me to do with two little ones running underfoot.
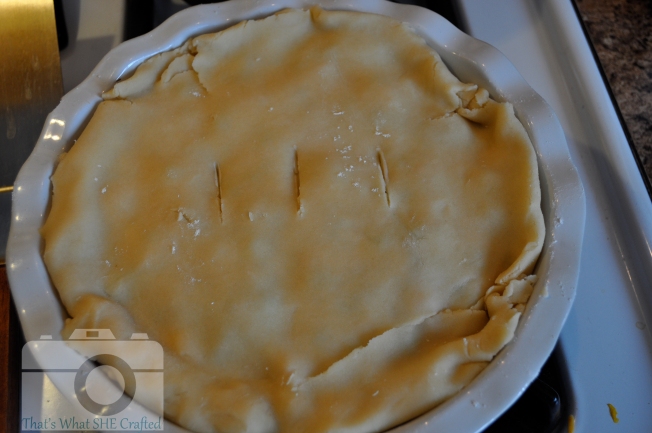
Carefully lay pie crust over top.  Tuck overhanging dough underneath itself to be flush with the rim of the pie plate so you don’t end up with burned edges.  Cut three 1-inch steam vents into the top of dough.  Please excuse the not so pretty pie crust.  I realized after I started that I forgot to buy pie crust and had to make it up quick.  Probably should have left it in the freezer a little longer before rolling it out.
Pie Crust On-- That's What She Crafted
I recommend when baking this to put the pie plate on a lined cookie sheet to catch any bubbling over that may occur.  Bake  at 425 degrees until filling is bubbling and crust is browned, about 25 minutes, rotating pie plate halfway through baking. Let cool slightly and serve.

Quick Chicken Pot Pie

SERVES 4 to 6

For connivence use a store bought rotisserie chicken– I find that 3 cups is about both breast pieces and one thigh piece.  If I haven’t picked up a chicken from the store I will also boil 3-4 thigh pieces or 3 breast pieces (I typically have chicken of some cut in the freezer).
Store bought pie crust makes for a quicker pie (unless you already have some made up in your freezer) but if you have the time you can make it as well.

8 ounces white mushrooms, trimmed and quartered (I bought 8 oz sliced and left them as is)
3 cups shredded rotisserie chicken
1 (5.2 ounce) package Boursin cheese: Garlic and Herbs
1 cup low-sodium chicken broth
1/2 cup heavy cream
1 tablespoon plus 1 teaspoon cornstarch
salt and pepper
2 cups frozen peas and carrots, thawed
1 refrigerated Pie Crust (Store bought comes with 2 crusts, you only need 1 for this recipe)
 
1. Adjust oven rack to middle position and heat oven to 425 degrees (or hold off on this if you will be making the filling ahead of time).  Microwave mushrooms on plate lined with 2 layers of coffee filters until softened, about 7 minutes.
2.  Meanwhile, combine shredded chicken, Boursin, broth, cream, cornstarch, 1/2 teaspoon salt, and 1/2 teaspoon pepper in large saucepan and cook over medium-high heat, stirring often, until cheese is melted and mixture is thickened, 5 to 7 minutes.
3. Stir in microwaved mushrooms and peas and carrots.  Season with salt and peper to taste.
4. Transfer to 9-inch deep dish pie plate.
5. Carefully lay pie crust over top.  Tuck overhanging dough underneath itself to be flush with the rim of the pie plate.  Cut three 1-inch steam vents into the top of dough.
6. Bake until filling is bubbling and crust is browned, about 25 minutes. Let cool slightly and serve.
Happy Eating!
Viever

Vegan Dumpling Dessert

Standard

Hey all! This is Jenn here and today I want to share with you my easy go to fall dessert! and it is vegan so – win! (especially if you are an allergy family or if you ran out of milk and eggs but need something sweet in a hurry). If you don’t want to eat it vegan go ahead and use regular milk and margarine.

twsc dumpling (6)

I am going to put the recipe at the start, since I hate scrolling to the end for the recipe and then back up to get hints for steps.  Hopefully this order is ok for all you readers. So without further dawdling here is the recipe for Vegan Caramel Pear Dumplings!

Vegan Caramel Pear Dumplings

Pre heat oven to 350 degress F

Cooking time 20-30 minutes

Pan size: 8×8

serves 5-6

Sauce:

1cup brown sugar

1 1/2 cups water

2T vegan margerine (I use becel vegan, but there is also earth balance and likely a few others out there)

Caramelize the above by bringing to a boil and letting it boil for a few minutes.

Batter:

1/2cup white sugar

2 T vegan margarine

1/2cup almond milk

1cup sifted flour

1tsp baking powder

pinch of salt

1 peeled and chopped pear

Cream the margarine and sugar together with a fork or in your mixer, then add in the milk. Sift the dry ingredients together and add to the wet and mix ever so slightly and then add in the pear and mix until well combined.

Pour the batter into the glass baking dish and then drop the batter by spoonfuls into the sauce and bake.

Now for the picture hints 🙂

The boil, I do 3-5minutes. If you do less the sauce will stay runny when baking

twsc dumpling (1)

ready to drop batter into sauce – the batter is pretty goopy.

twsc dumpling (2)

Here is what it looks like with the batter in the sauce before baking, as you can see there is no “right” way to do this – don’t stress about even spoonfulls or a perfect looking batter drop.

twsc dumpling (3)

Once it bakes up it looks like this, perfectly golden, sauce bubbled and soaked into the dumplings a bit. YUM!

twsc dumpling (7)

There you have it! If you have 15 minutes and need a dessert this is the recipe for you!