Author Archives: thatswhatshecrafted

St. Patrick’s Day Lunch

Standard

DSC_0003

First off, Happy St. Patrick’s Day!

IMG_0418

I’m Mae from over at The Life Of A Compulsive Crafter. I was asked by the lovely ladies at TWSC to guest blog once a month and quickly said yes!

Though I’m not much of a gourmet cook (eek, recipe please!), I still enjoy being in the kitchen. Today I chose to take a super simple and well known lunch option, tuna sandwiches – and show you a fun way to green them up and make them a bit healthier for St. Patrick’s Day.

Green Tuna Sandwiches

1 can of tuna

1/2  an avocado

2 tbsp mayonnaise

relish *optional

1 tbsp


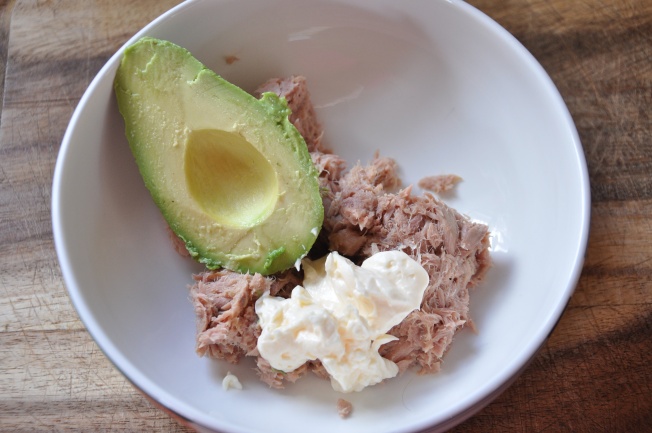
DSC_0004

Drain your tuna and place into a medium size bowl. Add your avocado and mayonnaise and mix well.  If you like relish, add that as well. Because the avocado has a nice creamy texture, you’re able to use less of the mayonnaise making it healthier. Plus, I just love me some avocado’s. So, if you’re as big of fan as me, slice up the second half thinly and lay it onto your tuna sandwich.


DSC_0009

I chose to eat mine spooned onto foccacia bread and added an extra punch of green by slicing a granny smith green apple as the side.

If you’re feeling extra green today, consider making this recipe, or you can use your imagination to dream up ways of turning some of your go-to recipe’s green. Pesto sauce? Spinach? I promise, it’s pretty fun! Have a great day!

VOTING & GIVEAWAY!

Standard

Wow! I am blown away with our lovely and witty Lola’s! If you haven’t read all the awesome posts, take a moment to take in all the many awesome reasons why this dress pattern is for you!

Lola Off

1- Her name was Lola. She was a Showgirl

2- Hello LOLA! Mee-ow!

3- Lola! BAM!

4- 50 Shades of Lola

THEN after composing yourself (good luck!) make sure to vote for your fav and enter the giveaway to win your very own PDF copy of the Lola!
I feel like one of the girls off Wheel of fortune here!

Alright, alright, and now onto the main course!! Enter to win your very own Lola PDF!!

********* ENTER——–>  a Rafflecopter giveaway <——–ENTER *********

Or you can buy it here at Victory Pattern Shop!!

Otherwise you get to be like me. Sad sad sad, that I don’t have a Lola!

4

The 50 Shades of Lola

Standard
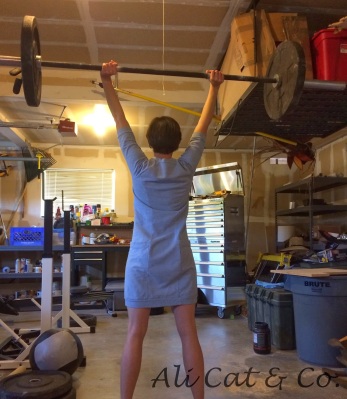
What’s up?  I’m Brianne from Ali Cat & Co.  All of the ladies at TWSC are dear, dear friends of mine.
They must feel the same way, because at 2:30pm yesterday, they asked me to do a guest post today on my Victory Lola.  They said they were in a pinch and needed some help.
I totally called BS on them.  I think the real reason is because no one wanted to post the day after
But I’m not one to back down.
Introducing The 50 Shades of Lola.
Lola is a Douche Bag
Ass, grass, or cash. No free rides.
Lola don’t read
good thing the Kama Sutra has pictures
Lola does Man Sh*t
will break up over text message
Lola is Promiscuous
twerkin er’body
Lola blasts dem biceps
Suns out Guns out
Lola likes cruisin for chicks
Haulin ass, gettin paid
Lola is yo Homegirl
until you run out of beer
What is your Lola saying?
Vote for me!

Lola! BAM!

Standard

It’s my turn to Lola!  Don’t I look AWESOME?  You know…awesome enough to win?!?!?  I do, you know it.  Let me sell you on it a little….

 OLYMPUS DIGITAL CAMERA

Not only is The Lola CUTE, not only is it easy to sew, but it’s also so effing comfy.  “HOW comfy??!?!” you ask?  Well, I’m calling it my PMS Dress.  You know those times you feel awful and just want to murder your uterus?  Well, the Lola is great for those days!

Demon Uterus Collage

But that’s not all folks!  Check out these pockets!

If you’re having cravings, the Lola pockets hold an ample supply of ice cream

OLYMPUS DIGITAL CAMERA

Need a Tampon?  Never run out!  The Lola has pockets big enough for 2 large boxes!

OLYMPUS DIGITAL CAMERA

Just had enough of your emotional & crappy day?  No problem!  The Lola can hold copious amounts of liquor- Drink the pain away! (healthy message right there)

OLYMPUS DIGITAL CAMERA

Get yourself a Lola!  Your body & mind will thank you

OLYMPUS DIGITAL CAMERA

This advertisement blogged to you by the “She” with the most mental issues: Crystal

Hello LOLA! Mee-ow!

Standard

Hello Lola! Victory Patterns Lola tunic

We SHE’s are so excited to do a Lola off this week! Yesterday you saw Viever’s, tomorrow you get to see another Lola from a different SHE. and Today, well today you lucky cats you get to see mine!

IMG_4623twsc

I will be honest, I LOVE the finished garment here, but the cutting… oh vie! Soooo many pieces! OK… only like 13…. so not all THAT many, I just hate cutting knit fabric.  The dress goes together faster than it cuts though! Seriously less than 2 hours, even with all the pieces and princess seams! I used my serger all the way for sewing this up and honestly I wouldn’t want to do it without a serger. I also made another Lola in sweatshirt fleece and that one is not nearly as flattering. So do yourself a favor and pick a fabric with a little more flow to it but not tooo thin for a flattering fit.

twsc

I am 5 and a half feet tall and did not adjust the pieces at all when I cut them. I did, however, lengthen the sleeves! I just didn’t get the point of a sweater dress with 3/4 sleeves! If I am wearing a sweater dress it is because it is cold, which means I NEEED long sleeves. Adjusting sleeve length is super easy though – I just measured sleeves that were full length and added a little extra when I cut for “better safe than sorry”.

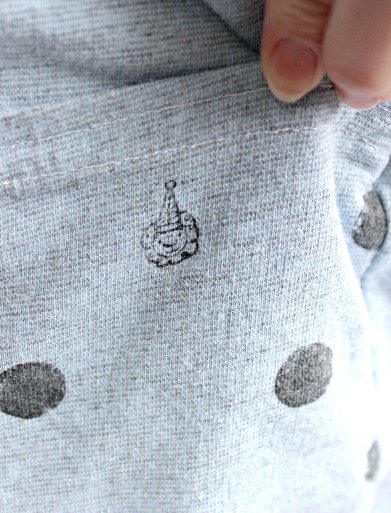
I measured in between a 4 and a 6. and I decided to do a size 4. I’m happy with my choice of size cut, it is fitted but not skin tight. I used a french terry knit fabric. The french knit only came in solid colors however…. and well… a light grey gets dull pretty quick and so I got out the fabric paint and polka dotted the pocket pieces and every so often I put a little fabric paint carefully on the party lion stamp because a girl has to have some fun every now and then!

IMG_4648

Thanks for reading ! and be sure to come back on the 6th and vote your favourite Lola of the week!

IMG_4647

Happy Sewing!

Jenn

Her name was Lola. She was a showgirl.

Standard

It’s been awhile since my last post.  The last time I put together a post it was my stuffed pork chop recipe which looks like it went uncontested in the pork off/stuff off so I guess I WIN!  LOL.  My fellow SHEs have gotten bogged down by obligations to family and this little thing called having a life.  So we’ve been on a bit of a hiatus from our blog but we hope to change that starting now.

 With a throw down of sorts: A who wore it best?  We give you Victory Pattern’s Lola.  Myself and two of my wonderful partners in crime have sewn up and worn this pattern.  We each will give our own review for the pattern and then on Friday, March 7th we will open it up for you to vote which “she” wore it best.  Announcing a winner on Monday, March 10th.  What do we win?  Bragging rights, my friend, bragging rights.

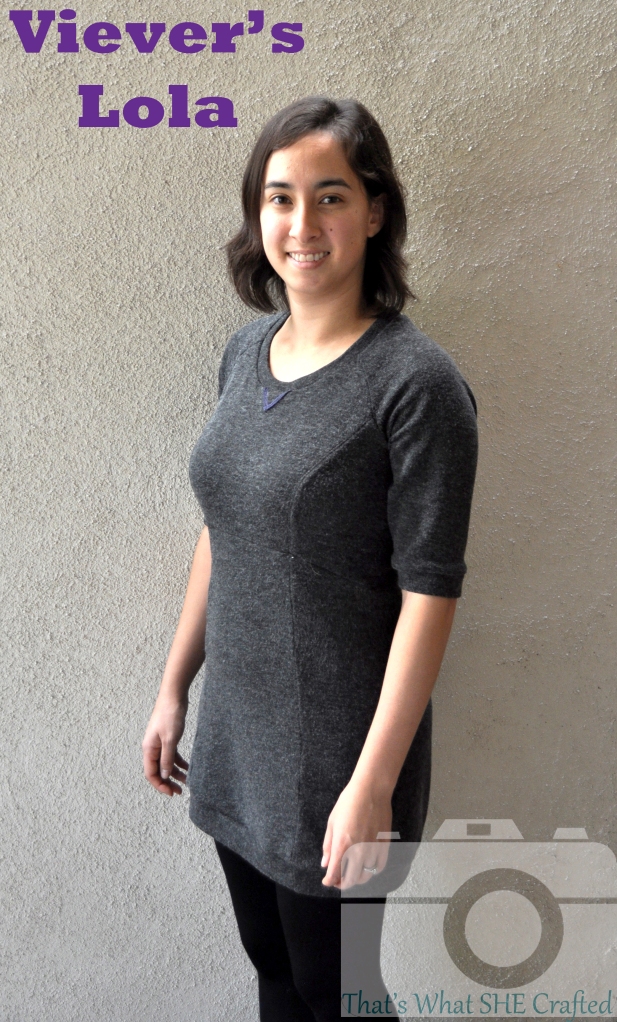
And so I give you my version of Lola sans pockets, taken in at the back seams about an inch, and fantastically comfy.

Viever's Lola-- That's What She Crafted

This pattern came together very quickly for me.  It was my very first for me knit piece and gave me some very good and needed practice with my serger.  I’m not confident enough quite yet to just go at it with my serger before sewing my seams with my trusty sewing machine, (baby steps, I’ll get there one day) but even with having to sew everything “twice” I finished this project in one evening. What you can’t see in the photos is that I used all purple serging thread.  So the triangle decal and all the inner seams have a fun pop of purple!

By the measurement guide for this dress I was between a six and an eight.  I did the six knowing that the knit would be forgiving and from advice from others who had made the dress.  I still took it in along the back seams as the dress was way baggy along my back.  So my version is a bit more fitted than originally intended but I like it.

I’m a shorty sitting at 5 feet 2.75inches.  I brought the skirt panels up to hit mid-thigh and adjust the bodice as well for my short frame.

All in all this is a super comfy dress.  Typically I pair it with leggings, boots, and if the kids will let me a wonderful cup a tea (or coffee).

Lola front-- That's What She Crafted
Happy dancing,
Viever

Mama Nancy’s Sweet Potato Casserole

Standard

We all know what sweet potato casserole is: sweet potatoes with a puffy marshmallow topping, right? Well, as much as I love big white puffy puffs of sugar, I really have never been a fan of the sweet potato casserole made this way. I grew up with my mother’s sweet potato casserole. It’s SO sweet but SO delicious!

Sweet Potato Casserole
The ingredients, simple and sweet:  Canned sweet potatoes, butter, milk, sugar, vanilla and eggs.

Sweet Potato Casserole
Drain your sweet potatoes and dump them into a bowl. Mash the crap out of them!

Sweet Potato Casserole
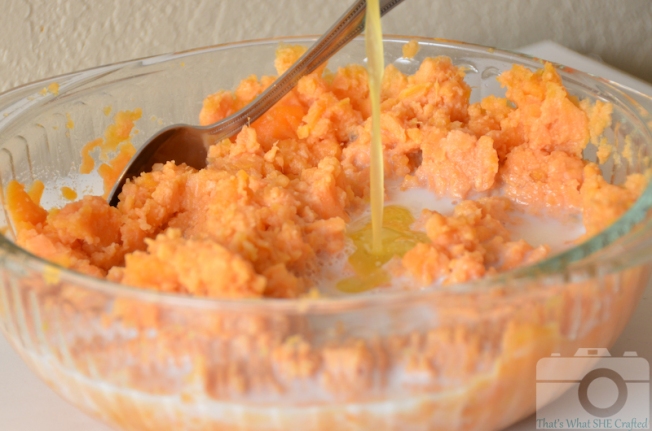
Pour your milk into your bowl of mashed sweet potatoes

Sweet Potato Casserole
Pour in your melted butter. Don’t pee into your casserole.

Sweet Potato Casserole
Dump your sugar, vanilla (Vintage green Tupperware measuring spoons make this casserole taste especially special), two eggs and then mix it all up real nice-like. Mmm mmm good! Now set it aside and we’ll prepare the topping!

Sweet Potato Casserole
Topping Ingredients: Self rising flour, brown sugar, melted butter and chopped pecans

Sweet Potato Casserole
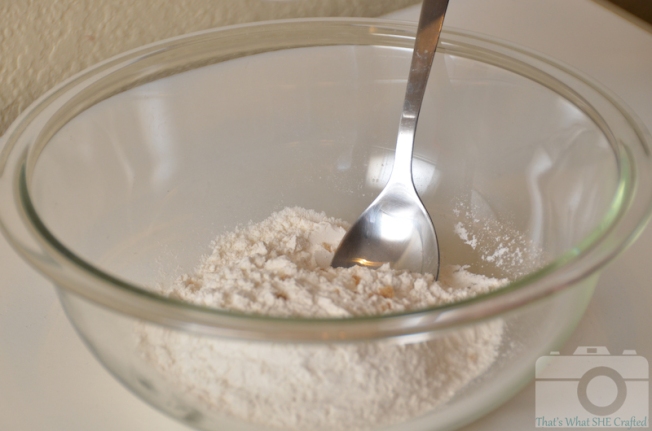
Dump your flour in a clear photogenic pyrex bowl

Sweet Potato Casserole
Dump in the pecans, brown sugar and melted butter in a slow delicate fashion so your husband can snap 3,000 photos to get JUST the right pour picture. Then mix it all up until it’s crumbly and delicious. Yes, I tasted the topping on it’s own. Yes it was delicious.

Sweet Potato Casserole
Pour the topping onto the casserole and smooth it out evenly. If you use a round casserole dish like I did, it’s going to seem like a THICK layer of topping, but it works out just fine. My mama has always made it in this dish, so it probably wouldn’t tasted near as good in any other dish.

Throw it in the oven. Well, don’t THROW it. Just set it in there gently. Unless you’re an angry cook. And you’re not using something breakable. And you don’t mind a big  mess. If that’s the case, go ahead and give it a nice throw.

Sweet Potato Casserole
Take it out of the oven when the topping is looking brown and toasty.

Sweet Potato Casserole
EAT IT. It might seem a little on the runny side when it first comes out. I recommend letting it sit for 15 minutes or so. And believe it or not, this recipe is actually still delicious heated up the next day. And the next day. And 3 days from then. Yum yum delicious!

Ingredients:

3 cans sweet potatos in syrup, drained & mashed
1/2 C milk
1 C sugar
2 eggs
1 T vanilla
1/4 C butter, melted

Topping Ingredients:

1 C chopped pecans
1 C brown sugar
1/2 C self-rising flour
1/3 C butter, melted

Pre-heat oven to 350°. Mix the main ingredients in a the casserole you plan to bake it in. Mix the topping ingredients in a small bowl and then spread evenly over the sweet potato mixture. Bake for 25-35 minutes, until topping is browned and toasty.

Candy

Apple and Bacon Stuffed Pork Chops with Caramelized Onions and Apple Cider Sauce

Standard

We don’t eat turkey in my house.  We do a ham each year at Thanksgiving so Karly and myself decided rather than take part of the stuff off we’d do our own pork off.  BUT I didn’t want to make up a ham so close to Thanksgiving as my husband and I would just be finishing the first ham when Thanksgiving finally rolled around.  So I went scrounging through my porky recipes to try and figure something else out that could be served at Thanksgiving or at least feels like a “fall” dish.  I think I succeeded.  Inspired by my husband’s like of the stuffed pork chops from Trader Joe’s and my own like of caramelized onions and sauces, I created this dish.  You know it’s a winner when my neighbor who is a vegetarian stops by and says dinner smells good and reminds her of fall.  Then I informed her it’s a pork dish and she responds, “Might be worth trying it still.”  Yup, winner winner!
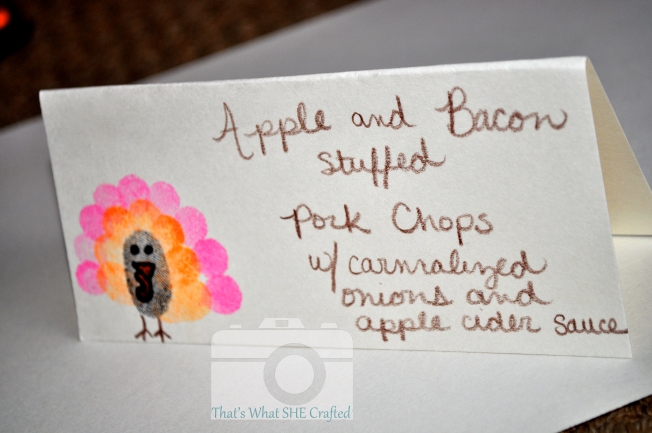
Food Card-- That's What She Crafted

I started with cutting up my apples and onion.  Diced onions went straight into the hot pan while the diced apples waited on the cutting board, and the slices of apples and onions waited their turns in bowls.

We are bacon snobs here in my house.  This bacon is home cured and smoked.  Don’t have time for that?  Thick cut bacon from the store works just fine.  4 slices please!  I like using my handy cast iron weight to keep things flat.

Onions nice and translucent and soft and in go the apples.
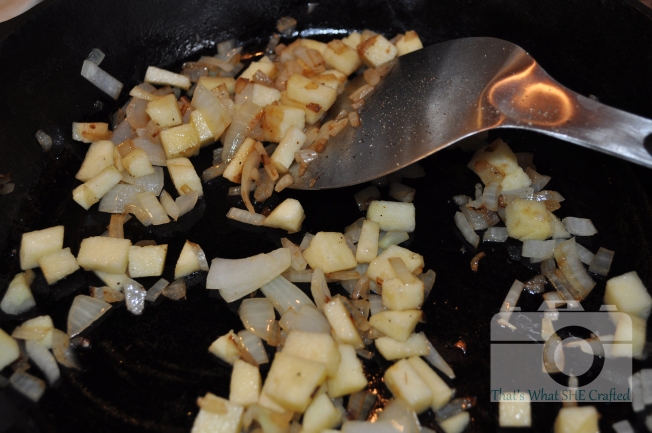
Onions and Apples-- That's What She Crafted

After the apples start to soften remove from heat and move mixture to a bowl.  Add a slightly beaten egg and chicken stock or broth.  Mix.  I forgot to leave out bread and forgot to toast it a little before I started so I baked my bread for a few minutes.  Oops.  Crush and tear up the bread.  Chop the crispy bacon.  Fold into the mixture making sure the bread soaks up all that liquid.

I don’t know about you but I can never find chops to the thickness I want without having to track someone down at the meat counter.  I bought a pork loin and cut my own slices (and froze my extra slices for another day).  Score the fat to prevent curling while cooking or trim it off.  Then create the pocket.

Stuff!  There’s lots of stuffing left so I took the extra and put it in an 8×8 pan.  Baked at 350 for 30 minutes and added the meat drippings when the chops were done.

Stuffed!-- That's What She Crafted

Back in the same pan I used for the onions and apples.  If I didn’t mind waiting on the bacon I could have done this dish all in one skillet.  Alas I didn’t want to wait and cooked a few things at the same time but 90% of the stovetop work was done in my trusty cast iron skillet!  Medium high heat, a tablespoon of olive oil, and NO TOUCHING for 3 minutes= browned perfection.  Repeat for my second batch.  Apparently I forgot to take pictures of the chops in the pan, whoops! Heading to the oven!  Don’t forget to cover!  Now to make the toppings!

Browned and ready to go in the oven-- That's What She Crafted

Hey look it’s the trusty cast iron again caramelizing the onions.  1 tablespoon olive oil and lots of stirring.  It’s worth it I promise. 20 minutes later browned goodness.

And time to pull out the chops!

Resting----That's What She Crafted

Apple slices turn!  Cook until they just start to soften.  Add the 2 tablespoons of maple syrup. Then add the apple juice and spices.  You could substitute real apple cider here too if you wanted.  Simmer.
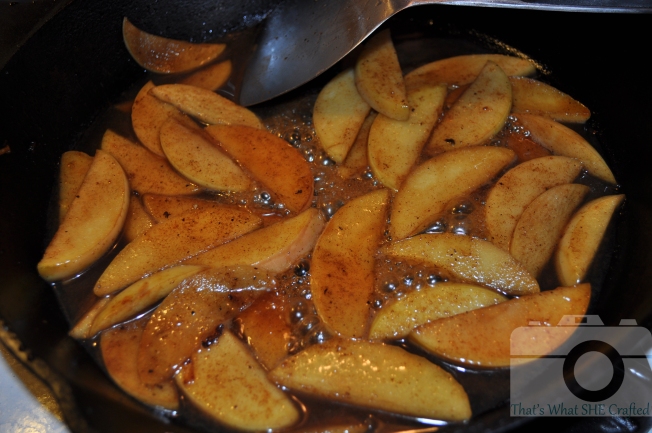
Apples simmering--That's What She Crafted

Pork Chops!  Assemble!  You can just go with a plain stuffed chop.  Or you can dress it up topping with the lots of onions, apples, and spoon on the sauce.  If you cooked up the extra stuffing you can serve it on top of the stuffing too so it catches all those yummy juices.  Side salad or some roasted veggies and you’ve got a nummy meal!
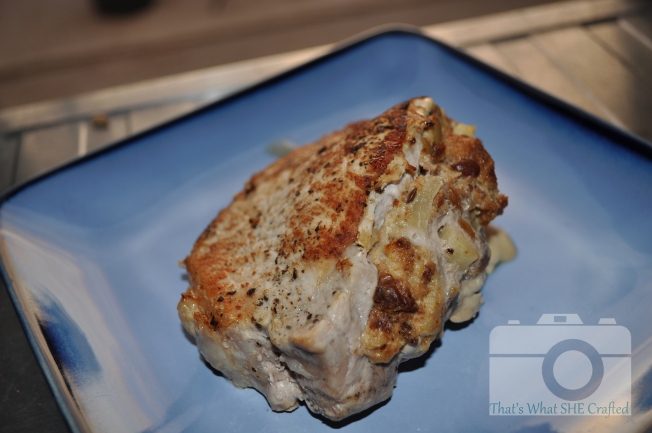
Plain stuffed chop--That's What She Crafted

Topped stuffed chop--That's What She Crafted

Apple and Bacon Stuffed Pork Chops
with Caramelized Onions and Apple Cider Sauce

Ingredients:

Stuffing
4 slices of thick cut bacon
1 Tablespoon olive oil
½  large onion diced
1 large apples diced
3 slices of old bread**
1 egg slightly beaten
2/3 cup chicken stock or broth

Pork Chops
4—1.5- 2 inch thick cut pork chops
Apple Bacon Stuffing
Salt and Pepper
2 tablespoons olive oil

Toppings
½ large onion ¼ inch slices
1 Tablespoon olive oil
1  apple ¼ inch wedge slices
2 Tablespoons maple syrup
½ cup apple juice
1/8 teaspoon ground clove
1/8 teaspoon ground nutmeg
¼ teaspoon ground cinnamon

** Leave the slices of bread out on the counter for 24 hours or if you’ve forgotten lightly toast the bread and leave it out for an hour or so.  You want dried out crusty bread so it absorbs the moisture.

Directions:
Stuffing
Brown the bacon until crisp.
While the bacon is browning, heat the oil to medium heat and then add the onions.  Cook until soften and translucent then add the apples.  Cook until softened.
Move the onions and apples to a medium work bowl and add the egg and chicken stock.  Mix.
Crush/rip the bread slices to large crumbs and mix into the onion apple mixture.
Roughly chop the bacon and add to the mixture.

Pork Chops
Heat oven to 350
Create a pocket in the pork chop by cutting through the middle leaving ¼ to ½ inch of space along the edges.  Also if you are not trimming off the fat make sure to score every inch to inch and a half along the fat end to prevent your pork chop from curling.  Season pork chops with salt and pepper.
Stuff the pork chop using the stuffing you made earlier.  You can use toothpicks to help hold everything together if needed.  You will have leftover stuffing.  If you desire you can grab a small baking dish and bake the leftover stuffing at 350 for 30 minutes.
Using a skillet heated to medium high heat, depending on the size of your skillet heat 1 TBS oil for cooking two chops or 2 TBS for all four chops.  Brown on each side for 3 minutes. (Repeat for the second two if you are having to do it in batches)
Move chops to 13 x 9 dish and cover.  Bake for 20 minutes or until pork registers an internal temperature of 145.
Uncover and let it rest for several minutes before serving.

Toppings
Heat 1 TBS olive oil in pan at medium heat.  Add onion slices.  Stirring frequently allowing the slices to brown and caramelize.  If onions are sticking to the pan you can use a little of the apple juice to help deglaze the pan.  This will take 15-20 minutes.
Remove onions from the pan.
Adjust heat to medium low.  Add apple slices.  Cook until apple just start to soften, about 4 minutes.
Add maple syrup and a touch of salt (pepper too if you want).
Add apple juice, nutmeg, clove, cinnamon and simmer for 3 minutes.
Serve the stuffed pork chop topped with lots of caramelized onions, apples, and cider sauce.
This main dish would pair well with almost any roasted vegetable!


Happy Eating!
Viever

Meat Buns Anyone?

Standard

So I don’t know about you all, but one of my favourite things to do with leftover turkey, or even chopped up chicky boob is to make stew and after a meal or two of stew I find everyone is getting a bit bored of that…  So then I take that stew and turn it into meat buns!!! I LOVE meat buns! Who doesn’t? They are fast, easy, a full meal in the palm of your hand.  (hehe).

So here is a quickie “how to” on making meat buns.

First thing I do in the morning is set a batch of dough off in the bread maker, I use my usual bread recipe by the way. Just be sure you set it on the dough cycle!
twsc meat buns (9)

Get out that gorgeous chicky stew you have made (recipe was up in the previous post)

twsc meat buns (8)

Now take a ball of dough, not too large, and spread it out to flatten in your hand – I use my hand to flatten (ish) it. No need to break out the rolling pin.

twsc meat buns (1)

A tablespoon or two of stew in the middle. You want a good amount but not too much or else you will have your bun break and the stew will try and escape.

twsc meat buns (2)

Fold the bun edges into the center, opposite ends together until your  stew is covered.

twsc meat buns (3)

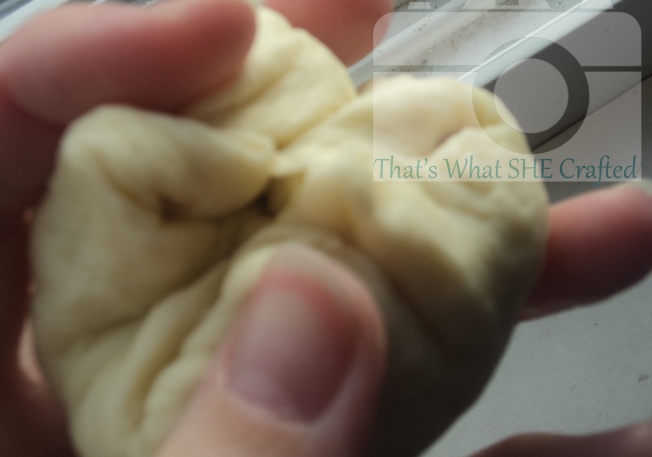
Then I kinda mush the center together lightly to make sure it is all nicely covered.

twsc meat buns (4)

Turn it over and make sure your stew is contained, see, all nice and pretty. It is ok if yours are not pretty… They will still taste good.

twsc meat buns (5)

This next picture is to show you the dangers of over stuffing the meat bun. (lol! oh the things I write… I am killing it!)

twsc meat buns (6)

Bake at 350 degrees Fahrenheit for about 20 minutes, until they are nicely browned 🙂

twsc meat buns (7)

When I make these up I usually cool them off, bag them, and then pop them into the freezer straight aways. Perfect for meals on the go! So grab a ball in each hand and head out the door in confidence! You will have an amazing lunch on the go! Now go brave those malls and tackle the Christmas shopping!

Jenn

Tiny Turkey Hands

Standard

My little boy is currently in a crafting/coloring frenzy phase.  Any time his sister isn’t around he breaks out his marker and asks for paper.  He loves creating little “projects” or “systems” as he sometimes calls them.  Many times during one of the two naps V still has during the day he and I will create something.  Whether it’s just plain coloring in a coloring book, creating a story, or making something for dessert he’s always a happy boy with the one on one attention and some sort of product to show his daddy when he gets home.

This week I decided to base our project off of something I did as a first grader.  So a LONG time ago I remember getting to make up my own stationary using our thumbprints to create little animals, I specifically remember making a pig.  I believe this stationary was then given to my mother as a mother’s day gift.  Anyway with all the turkey crafts out there that involve cutting which S really isn’t all that good at yet I thought this could be a cute way to make up some pictures and maybe make a card to send to the grandparents.

Well S had other ideas.

He decided he did NOT want to just use a thumbprint or a fingerprint.  What he really wanted was to do a handprint (probably because the last time we had the ink pads out we did handprints to mark 6 months for V and 3 years for S).  So I obliged and we have our craft to share:  Tiny Turkey Handprints.  Fingerprint turkeys will wait for another day.

Tiny Turkey Handprints-- That's What She Crafted

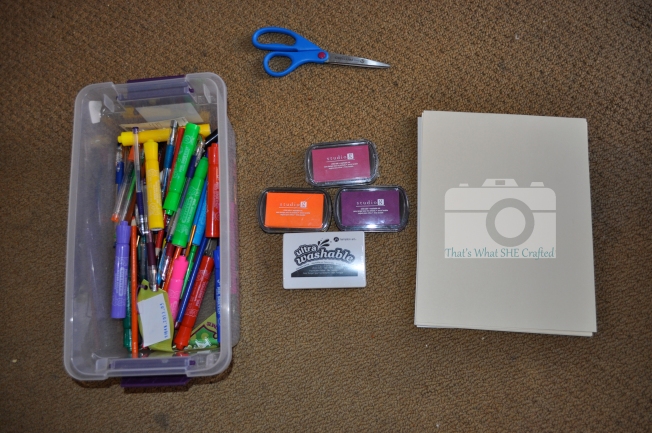
Begin with gathering your supplies.  We used kid friendly ink pads purchased at JoAnn’s (I wish I had made another trip out before we did this craft to get brown and some other colors but we made due with black, pink, purple, and orange), cardstock, scissors, and markers/colored pencils/crayons.  Baby wipes or a wet paper towels are a handy thing to have too.

Supplies-- That's What She Crafted

First decide what your project will be.  S wanted to make just pictures so I left the cardstock alone.  However this could easily be made into a card if you wanted to fold/cut the cardstock to the size you want.

For the ink, I stamped S’s hand first with the black on his thumb and palm.  Then we did each finger up as a colored feather.  First time we did it with each finger being a separate color.  The second time I started with the first segments of his fingers closest to his palm with one color, then the second segment with another color, and finished up with the tips of his fingers with the third color.  NOTE: If you are going to do multiple colors on the fingers I recommend NOT doing the thumb/palm until last AND starting with the lightest color and moving to the darkest as there may be transfer of ink between the pads as you ink up the hand.

Press hand firmly on to the cardstock.  Making sure your little one actually puts their palm all the way down too (ask me how I know this… we had a few turkeys that were just tail feathers).

Now that the hand print is done.  Quick clean up before you have handprints all over your house!  Love how clean these inks clean up!

Add an eye, a beak, and wattle (the red dangly thing).  You can also outline with a black marker to bring out the features.

Add details---- That's What She Crafted

For one of our pictures I added a background per what S asked for/told me the turkey was doing- he tried to tell me the turkey was eating some ham but then we talked about what turkeys eat so then he decided on seeds.  Then we added some of the things he was grateful for.  Insta-fridge material!

Thankful for-- That's What She Crafted

Gobble Gobble!
Viever